
Choosing the right boot is one of the most important decisions you will make when it comes to mountain hunting. Unfortunately, it is not as simple as doing an internet search for product reviews and picking the one with the most stars. Although admittedly, there can be some value in this as a potential starting point. Online reviews are often very useful to learn if a particular boot is prone to certain characteristics or problems. What fits one person well will not likely fit the next so trying boots on is of course a necessity to properly compare brands that will work best for you.
Make a short sighted decision in your quest for the proper boot and you will likely be miserable, in pain, and not very efficient as your hunt progresses from day one to day fourteen. Mountain hunters require the very best in support and durability. As such, you will likely require a durable boot exterior and sole that won’t get eaten up by rocks and shale. A high rubber rand is also helpful. The boots will also need to support heavier pack loads, especially coming off the mountain with your hard won reward.
There are many nuances to getting your preferred boots to feel just right if the out of box fit is a little less than perfect. Here are three very important components that some might tend to overlook. These include proper sock selection, aftermarket insole selection, and learning variables in lacing techniques. Knowing how to utilize various lacing techniques will also help you to fine tune your boots as needed during any given adventure.
When purchasing new boots, the factory insoles often feel perfectly acceptable. If that is the case for you consider yourself lucky. Many of us find the need for various levels of support because of our different arch height requirements, the need for additional support, better foot control in the heel cup, or more forefoot padding. The goal of aftermarket insoles is of course proper biomechanical alignment, comfort, reduction of shock, and improved foot control.
Regarding insoles, some shoppers can afford to seek out custom-made orthotic insoles but many are quite satisfied using trim to fit or heat-moldable insoles. The heat-moldable varieties will of course create a more custom do-it-yourself approach specifically molded to your foot. The only problem is you can’t try them on to see if you like how they feel before you buy them. You will need to make the investment and hopefully they will provide what you need. There is nothing wrong with this approach but it is an aspect to consider before you buy.
The trim to fit variety of insoles can be inserted into your specific boot and trialed at your local shop that carries the brand or brands that are of interest to you. My local REI shop happens to have a selection of trial models that they allow customers to slip in their boots and test drive in the store. It offers a great way to compare brands and models within brand lines to see what feels best! I am sure this is available through other outdoor shops as well.
Once you find the trim to fit insole that feels the best, purchase one pair and take them home. You will then need to remove your factory insole and trim the replacement insole following their supplied instructions. Once they are trimmed, you can insert them into your boots and start using them on your training hikes. If they work well, I would recommend purchasing an additional pair, trim them to fit and keep them with you as a rotational pair on your hunts.
Annually, I put a minimum of fifteen miles per week on my boots rain or shine during my mountain training hikes. This does not include actual hunting. It is easy to forget at times but insoles do not last forever. Replace them regularly to help assure you keep your feet as happy as they can be made to be. Recently, I noticed my feet were getting a little sore during my hikes for no apparent reason. I inspected my insoles and noticed they were in need of replacement. I had not changed them for about 12 months. For me, that was a little too long. Everyone’s mileage and timelines will of course vary based on use. When you consider all the costs associated with your outdoor hunting adventures, regularly replacing insoles is not even on the radar as a cost concern.
This is probably as good a place as any for a short word or two about socks. They are not all created equal from your foot’s perspective. Don’t be afraid to try different thicknesses and of course different fabrics such as wool, high tech fabrics, or blends to see what works best for your needs.
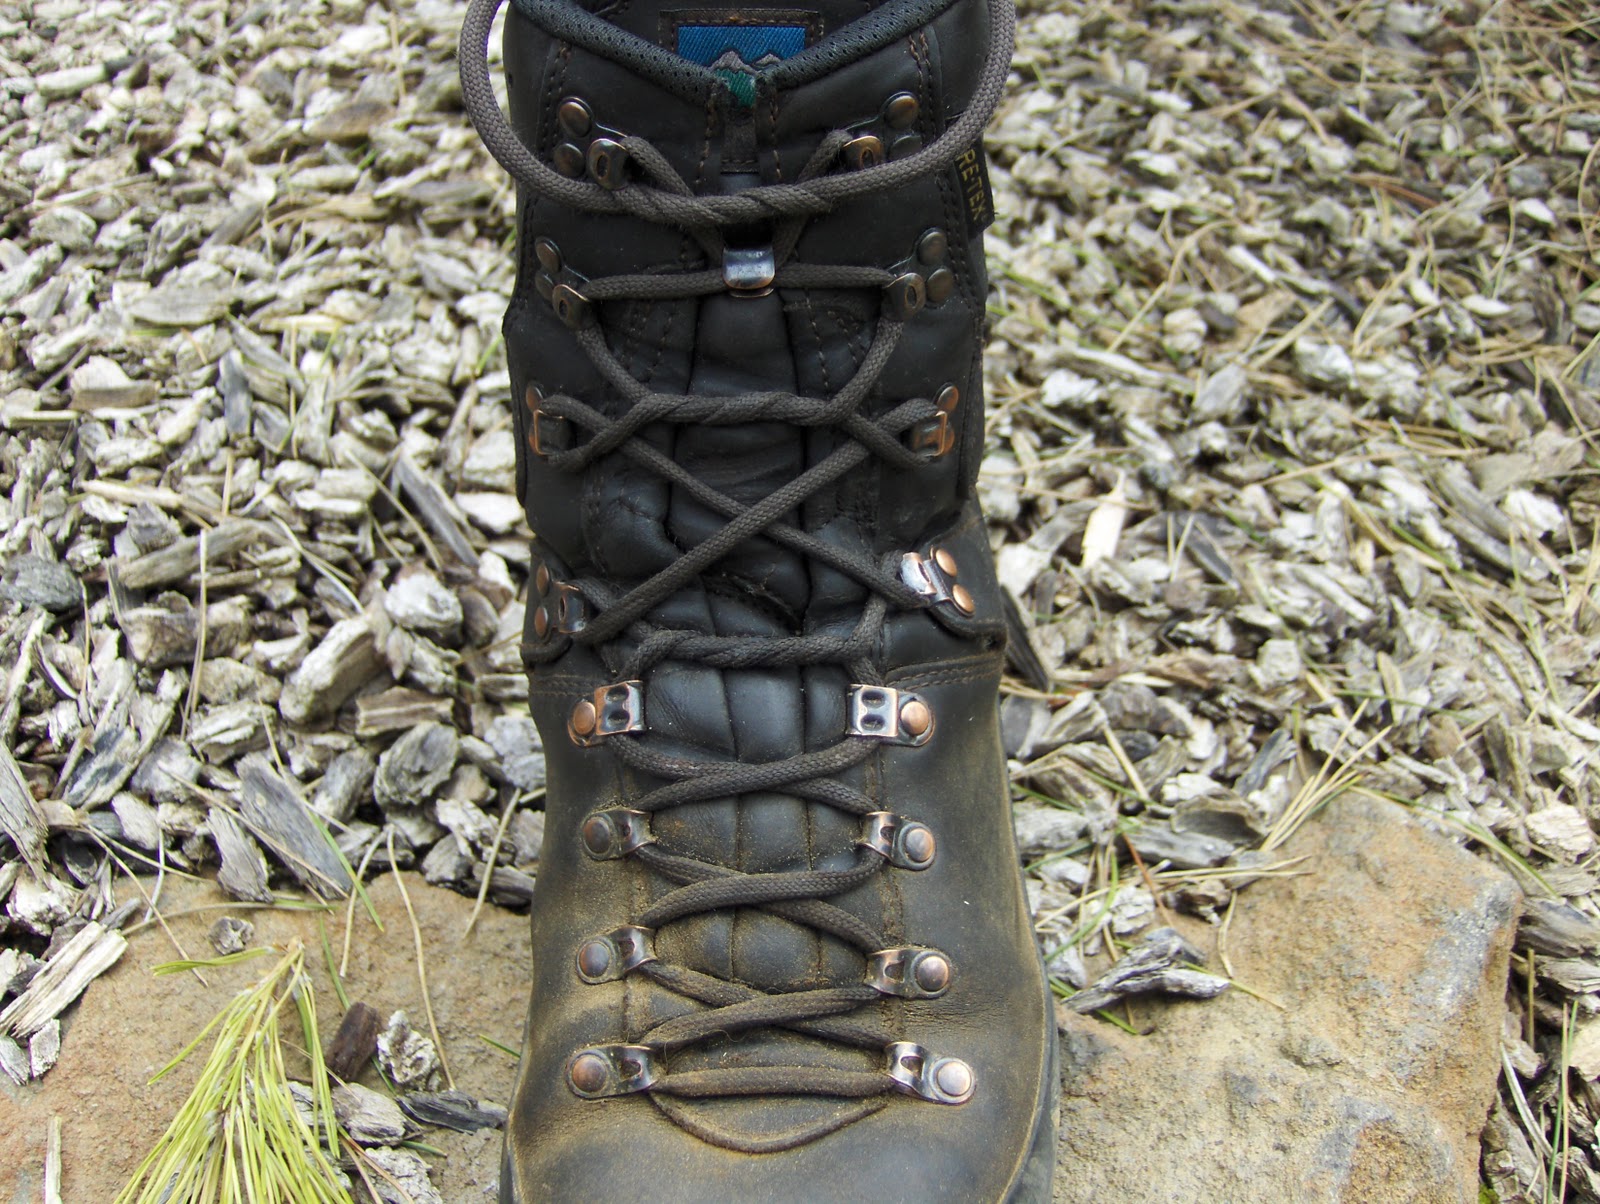
There are many methods for lacing a boot. I am surprised by the number of people who spend a great deal of time outdoors in boots and are simply unaware of these techniques and what can be achieved. If a standard lacing method works for you then that is great! If you think there is a possible benefit to be gained with lacing and knot variations, give a few different techniques a try and see how your feet feel about it. Now you know why those boots of yours came with such long laces!
When you lace your boots the goal is generally to create even firm pressure from the lace to the boot surface creating a secure and firm foundation while avoiding overtightening. Lacing technique options may vary slightly based upon the overall eyelet style of your boot or eyelet style in different sections of the boot. These would include variations such as regular eyelets, D-loop, lugs, and other speed laces.
There are seemingly unlimited variations of lacing techniques and knots but starting with just a few can offer a lot of versatility in properly adjusting or securing your boots. By learning and using simple lock, tension, and knot techniques you can then customize to suit your specific needs. It used to be that to learn these techniques you had to pick the brain of savvy climbers. That was how I first learned a few basic techniques. With access to the internet, all this information is easily available to all from the comfort of their home.
When using unmodified lacing, the laces typically come up from below and under the boot eyelets. When switching to a locking technique you can either continue from the bottom of the eyelet or come around and down through the eyelet to apply pressure to the lace. This can then be followed with an overhand knot or a surgeon's knot interval where needed to secure the tension you have adjusted through the eyelets below the knot. I prefer using the surgeon’s knot as it locks extremely well. Locking techniques are very useful in stabilizing your foot without the need to create unnecessary amounts of pressure through the laces.
 |
| Heel Lock Technique |
A boot heel lock technique is useful to help maintain pressure in such a way as to keep your heel and foot in place. This can be accomplished easily by taking the lace along the outside of two hooks, as opposed to crossing the lace at each hook, and then bring the lace back down over the upper of the two hooks hooks and passing the lace free end under the opposite straight lace created between the hooks, pulling with tension and then going up to the next highest hook resuming a normal lace crossing technique. Variations of this technique can be utilized such as an overhand or surgeon’s knots along with a loop locks.
 |
| Loop Lock Technique Used to Help Adjust a Low Volume Situation |
A loop lock is typically created by going over a hook as opposed to coming up from the bottom of the hook and then crossing the laces and going to the next hook. This will create a loop around the hook. I find this technique is useful if I choose to wear a thinner sock which then creates a lower foot volume condition inside of my boot. This technique helps to comfortably take up that space created by the thinner sock.
 |
| Reducing Pressure on a High Instep |
You can reduce pressure over your instep by locking off tension with a surgeon’s knot, then skip the lace crossing technique where the boot would bend naturally over the instep hooks, and then again lock off tension with an overhand or surgeon's knot above this area. This creates a larger open area free of crossing laces over the instep which will be noticed as a reduced amount of pressure.
Most finish their boot with a square knot and avoid a granny knot which is said to often slip. Those that double knot are sometimes less concerned about a granny knot. There are some variations you can consider prior to the finishing knot. Cuff pressure can be controlled at the top of the boot by lacing over the top of the final hook and tying off below the hook. You can also adjust cuff pressure by using a normal hook approach at the top and adding a surgeon's knot prior to the final knot. An alternate method for boots with a top eyelet is to create a loop lock through the eyelet prior to the final knot. I generally finish my lacing with a surgeon’s knot topped with a modified double knot. This gives me a secure non-slipping knot that is easily untied with a simple pull of a lace end.
|
| Finished with a Double Knot Over a Surgeon's Knot |
If you are interested in learning more about knot and lacing techniques there are numerous sites that you can visit through an internet search. Keep in mind that some lacing techniques are nothing more than a way to add flash or style. You will likely want to focus on learning the techniques that will offer performance enhancements and adjustability gains.